

Hand-washing with mild detergent and cool water is the safest, most reliable way to clean most golf hats while preserving shape, color, and logos. For most caps, it outperforms every other method on material safety and brim protection.
Three other methods are viable, each with conditions:
- Dishwasher (low effort, moderate risk): works for many cotton and polyester caps; avoid if the hat has leather trim or a cardboard brim
- Washing machine (convenient, higher risk): acceptable only for plastic-brim, label-permitted fabrics with a hat cage and cold water
- Spot treatment (targeted, minimal risk): best for isolated sweat stains, salt halos, and oil marks between full washes
Before you start any method, check the care label and identify your brim type. Those two steps determine which options are safe for your specific hat.
Pro Tip: If your hat has no care label or you cannot read it, default to hand-washing. It is the lowest-risk baseline across nearly all hat materials.
Key Takeaways
Hand-washing with mild detergent and cool water, followed by air-drying on a hat form, is the safest and most reliable method to clean golf hats and extend their life.
| Point | Details |
|---|---|
| Hand-wash is the baseline | Use cool water, mild detergent, and a soft brush; safe for most materials and brim types. |
| Check brim and label first | A cardboard brim or “hand wash only” label rules out machine and dishwasher methods. |
| Always air dry on a form | Heat from a dryer warps brims and shrinks fabric; reshape the crown while still damp. |
| Test spot treatments first | Apply baking soda paste, vinegar, or OxiClean to a hidden seam before treating the full stain. |
| Jaguargolf hats | Built with performance fabrics and construction that hold up to repeated proper cleaning cycles. |
Table of Contents
- What you need to check before cleaning your golf hat
- Tools and supplies to have on hand
- How to hand-wash your golf hat step by step
- Does the dishwasher method actually work?
- When is machine washing acceptable?
- How to remove sweat stains, salt rings, and oil marks
- Caring for leather, suede, wool, straw, mesh, and structured visors
- How to dry and reshape your hat correctly
- Do’s and don’ts: quick reference before you start
- Jaguargolf quick test results: hand-wash, dishwasher, and machine
- Why hat care is worth more than most golfers think
- Jaguargolf hats are built to handle proper care
- Sources
What you need to check before cleaning your golf hat
Reading the care label
The care label is the first stop. Look for these signals:
- “Hand wash only”: skip the machine and dishwasher entirely
- “Do not bleach”: avoid OxiClean on colored fabrics and any chlorine-based product
- “Dry clean only”: spot-clean at home; send serious stains to a professional
- No label: treat the hat as delicate; hand-wash in cool water
The brim test
Brim material determines whether soaking or machine cycles are safe. Run a quick brim identification check before choosing your method:
- Cardboard brim: flick the brim lightly. A hollow, papery sound means cardboard. Soaking will warp it permanently. Spot-clean only.
- Plastic brim: the brim feels firm and slightly flexible. It can handle hand-washing and, with precautions, machine or dishwasher cycles.
Material decision tree
| Material | Recommended method | Key caution |
|---|---|---|
| Performance polyester | Hand wash or gentle machine | Avoid high heat; watch heat-transfer logos |
| Cotton/twill | Hand wash or dishwasher | Cold water only; check for cardboard brim |
| Wool | Hand wash, wool-safe detergent | No soaking if label says dry clean |
| Leather/suede | Spot clean only | No water saturation; use leather conditioner |
| Straw | Dry brush and spot clean | Avoid water saturation entirely |
| Mesh | Hand wash or gentle machine | Gentle cycle; avoid snagging on agitator |
Pro Tip: Before any full wash, dab a small amount of your chosen cleaning solution on an inside seam or sweatband edge. Wait two minutes. If color transfers to the cloth, switch to plain cool water only.
Tools and supplies to have on hand
Gather these before you start. Having everything ready prevents mid-process improvisation that damages hats.
Cleaning agents:
- Dawn dish soap (or any mild dish soap): effective on oil-based stains and general grime
- Mild laundry detergent: Woolite or a gentle sport-wash formula works well
- OxiClean (oxygen-based stain remover): useful for white or light-colored hats; use with caution on colors
- Baking soda: pairs with water to form a paste for sweat stain pre-treatment
- White vinegar: diluted 1:1 with water for odor and mineral deposits
Tools:
- Soft-bristle brush or old toothbrush for scrubbing the sweatband
- Clean basin or sink
- Absorbent towels for blotting
- Hat form, inverted bowl, or coffee can for reshaping while drying
- Dishwasher hat rack or hat cage for machine or dishwasher cycles
- Mesh delicates laundry bag for machine washing
- Magic Eraser for stubborn marks on visors and brims
Avoid entirely:
- Chlorine bleach (causes yellowing on synthetics and color loss on cotton)
- Harsh stain removers with solvents
- Dryer sheets or fabric softener (can coat performance fabrics and reduce breathability)
How to hand-wash your golf hat step by step
Hand-washing is the recommended, low-risk method to extend hat life for most materials and brim types. It gives you direct control over pressure, temperature, and dwell time, which no machine can replicate.
- Pre-treat the sweatband. Apply a small amount of Dawn dish soap or baking soda paste directly to the sweatband and any visible stain. Let it sit for 15 minutes.
- Fill a basin with cool water. Add one teaspoon of mild detergent. The water should feel cool, not cold or warm.
- Submerge the hat. Gently press it under the water. Let it soak for 15–30 minutes for general cleaning, or up to 45 minutes for heavy sweat buildup.
- Scrub the sweatband. Use a soft toothbrush in short, circular strokes. The sweatband collects the most salt and oil, so spend extra time here.
- Clean the crown and brim. Use the same brush with light pressure. Avoid scrubbing logos or embroidered patches aggressively.
- Rinse thoroughly. Hold the hat under cool running water until no soap remains. Soap residue left in the fabric can attract more dirt.
- Remove excess water gently. Press the hat between two clean towels. Never wring or twist.
- Reshape and dry. Place the hat on a bowl or hat form immediately (see the drying section below).
What to expect: Most sweat stains lighten significantly after one wash. Older, set-in stains may need a second treatment with a baking soda paste before the next wash cycle. Yellowing on white hats often requires an OxiClean pre-soak before hand-washing.
Does the dishwasher method actually work?
The dishwasher can clean many modern cotton and polyester caps effectively. At-home testing confirmed strong results on modern caps but found that leather trim and cardboard brims are reliably damaged by dishwasher cycles. Use this method only for plastic-brim hats with no leather components.
Steps:
- Pre-treat any heavy stains with Dawn or baking soda paste before loading.
- Place the hat on the top rack using a hat cage or dishwasher hat rack to hold its shape.
- Add a small amount of non-bleach dish detergent to the dispenser.
- Turn off the heated dry setting. This is the most critical step. Heat warps brims and shrinks fabric.
- Run a normal or light wash cycle with cool or warm water.
- Remove the hat immediately when the cycle ends and reshape on a bowl or hat form.
Pros vs. hand-washing:
- Hands-free and low effort
- Good penetration into fabric weave
- Consistent water temperature throughout
Cons vs. hand-washing:
- No control over scrubbing pressure
- Risk of color fading from detergent concentration
- Damaging to leather trim, glued patches, and cardboard brims
- Heated dry setting is a common mistake that ruins hats
When is machine washing acceptable?
Machine washing is the highest-risk method and should be the last choice, not the default. Modern plastic-brim polyester or cotton caps can be machine-washed safely when you follow every precaution below. Skip this method for wool, leather, straw, or any hat with a cardboard brim.
- Pre-treat stains with baking soda paste or Dawn. Let it dwell for 15 minutes before loading.
- Place the hat in a hat cage or secure it inside a mesh delicates bag. Both protect crown shape.
- Add padding. Toss two or three clean towels into the drum. They cushion the hat and prevent it from slamming against the drum walls.
- Select cold water and the gentle or delicate cycle. No warm or hot settings.
- Use a small amount of mild detergent. Less is more; excess soap is hard to rinse from structured caps.
- Remove the hat immediately when the cycle ends. Do not leave it sitting in the drum.
- Reshape at once and place on a hat form or bowl to dry.
Pro Tip: If the brim warps slightly after a machine cycle, controlled steam from a garment steamer held 6–8 inches away, combined with gentle manual reshaping by hand while the brim is warm, can sometimes restore the curve. Work slowly and stop if the brim resists. Prevention is always the better approach.
How to remove sweat stains, salt rings, and oil marks
Targeted pre-treatment consistently improves stain removal outcomes, especially on white and light-colored hats. Baking soda paste, vinegar soaks, and oxygen-based removers all lift sweat stains when applied before washing. Always test on an inconspicuous area first.
Recipes and procedures:
- Baking soda paste (sweat and yellowing): Mix two parts baking soda with one part water to form a thick paste. Apply to the stain, let it sit for 20–30 minutes, then scrub gently with a toothbrush and rinse.
- White vinegar solution (odor and mineral deposits): Mix equal parts white vinegar and cool water. Dab onto the stain with a cloth. Let it sit for 15 minutes, then rinse. Do not saturate leather or suede.
- OxiClean (whites and light colors): Dissolve a small amount in cool water per package directions. Soak the stained area for 15–30 minutes. Rinse thoroughly. Avoid on colored fabrics without testing; hydrogen-peroxide-based formulas can lift dye.
- Dawn dish soap (oil and sunscreen marks): Apply a drop directly to the stain. Work it in with a toothbrush using short strokes. Let it sit for 10 minutes, then rinse.
For salt halos specifically: Salt rings are often removable without scrubbing. First, brush away any loose crystals with a dry cloth. Then dab the ring with a barely damp cloth, working from the outside edge inward. Aggressive scrubbing lifts color from the fabric around the ring, making the stain look worse.
When to stop: If a stain does not respond after two treatment cycles, additional scrubbing risks fiber damage. At that point, a professional hat cleaner is the better call.
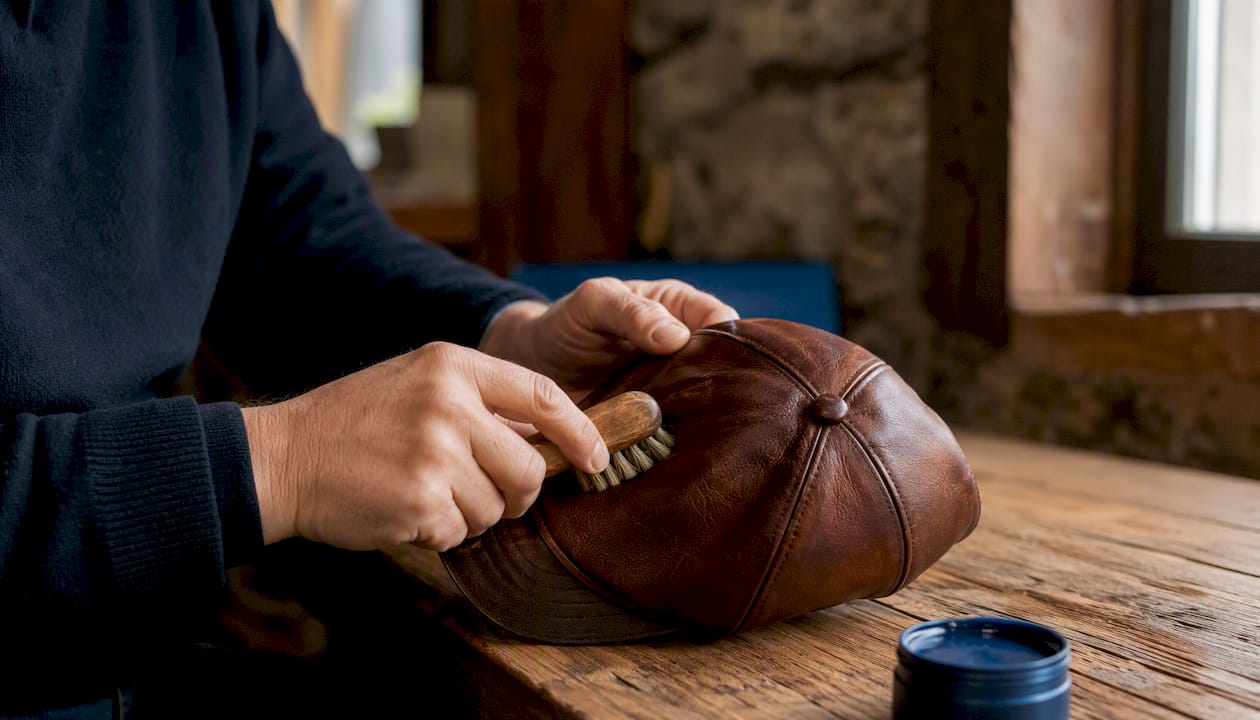
Caring for leather, suede, wool, straw, mesh, and structured visors
Generic cleaning methods damage specialty materials. Each fabric type needs a specific approach. For a deeper look at how golf hat materials affect care and durability, the fabric guide covers construction differences in detail.
| Material | Recommended method | Avoid | Reason |
|---|---|---|---|
| Leather | Spot clean only; leather conditioner | Water saturation, machine, dishwasher | Water stains and dries out leather |
| Suede | Dry brush; suede eraser; professional cleaning | Any liquid cleaner | Liquid causes permanent texture change |
| Wool | Hand wash, wool-safe detergent, cold water | Hot water, soaking (if dry-clean label), dryer | Felts and shrinks irreversibly |
| Straw | Dry brush; damp cloth spot clean | Water saturation | Warps and loses structure when wet |
| Mesh/performance | Hand wash or gentle machine | High heat, harsh detergent | Heat damages heat-transfer logos |
| Structured visor | Spot clean brim; hand wash crown | Soaking the brim | Soaking can separate brim layers |
Key notes:
- Leather and suede patches on otherwise washable hats change the entire cleaning approach. Spot-clean the whole hat rather than submerging it.
- Wool hats that carry a “dry clean only” label should not be soaked at home, even in cool water. The fiber structure can felt permanently.
- Material-specific care matters significantly: wool and leather require very different strategies, and the wrong method can permanently alter texture and fit.
- Mesh panels on performance caps are generally durable, but heat-transfer logos (common on tour-style caps) can peel if exposed to hot water or a dryer; for advice on performance fabric care and durability, see the Benefits of Premium Athletic Wear for Real Performance – #TeamJHall.
How to dry and reshape your hat correctly
Drying is where most hat damage happens. Heat from a dryer shrinks fabric and warps brims. Direct sunlight fades color. The right approach is slow, supported air-drying.
- Blot, do not wring. Press the hat firmly between two dry towels to remove surface water.
- Stuff the crown. Pack a small, clean towel loosely inside the crown to help it hold its shape as it dries.
- Place on a form. Set the hat on an inverted bowl, coffee can, or dedicated hat form. The goal is to support the crown from the inside while air circulates around it.
- Position away from heat and direct sun. A shaded spot with good airflow is ideal.
- Check and adjust. After two hours, check the brim. If it has shifted slightly, gently bend it back by hand while the fabric is still damp.
Expected drying times by material:
Pro Tip: Wearing the hat lightly for 15–20 minutes while it is still slightly damp helps the crown conform to your head shape. Do not wear it until the brim is fully dry, or the brim may set in a warped position.
Do’s and don’ts: quick reference before you start
Do:
- Check the care label before choosing any method
- Test your cleaning solution on a hidden seam first
- Use cold or cool water for every method
- Air dry on a hat form or inverted bowl
- Reshape the crown and brim while the hat is still damp
- Clean every 3–5 wears, or sooner in hot weather, to prevent sweat salts from setting
Don’t:
- Use chlorine bleach on any hat material
- Use hot water (causes shrinkage and color loss)
- Put any hat in the dryer
- Scrub logos, embroidery, or heat-transfer graphics aggressively
- Soak a hat with a cardboard brim
- Iron a hat directly (steam from a distance is acceptable for reshaping)
Red flags that mean spot-clean only:
- A crinkling or hollow sound when you flick the brim (cardboard)
- Leather or suede patches anywhere on the hat
- Glued components or decorative elements that could separate in water
- A “dry clean only” label
Jaguargolf quick test results: hand-wash, dishwasher, and machine
Jaguargolf tested a small sample of its own hats across three cleaning methods to document real-world results. The sample was limited in size, so these findings are observational, not statistically conclusive. They reflect what happened with specific Jaguargolf materials and constructions.
Summary of results:
- Hand-wash: Consistent stain removal on sweatbands across all tested caps. No shape distortion. White performance caps showed the most improvement when baking soda paste was used as a pre-treatment.
- Dishwasher (top rack, no heated dry): Strong cleaning results on cotton and polyester caps without leather trim. One cap with a bonded leather logo patch showed edge lifting after the cycle.
- Washing machine (cold, gentle cycle, hat cage): Acceptable results on plastic-brim polyester caps. One structured visor showed minor brim flex that was corrected by hand-reshaping while damp.
Key observation: The dishwasher produced the best hands-free cleaning result on plain cotton and polyester caps, but it is the least forgiving method when a hat has any leather, glued, or heat-sensitive component. Hand-washing remained the most consistent performer across all hat types tested.
Pro Tip: Request before-and-after photos from Jaguargolf’s product team to see actual cleaning results on specific hat styles before choosing your method.
Why hat care is worth more than most golfers think
There is a tendency to treat a worn-out golf hat as disposable. Buy a new one, move on. That logic makes sense when a hat costs very little, but it breaks down when the hat carries a logo you care about, fits your head exactly right, or is made from a material that took time to break in.
The real question is not “can I clean this hat?” It is “at what point does cleaning stop being worth it?” Persistent odor that survives two full wash cycles usually means the sweatband fabric has absorbed oils and bacteria beyond what surface cleaning can reach. Structural brim collapse, where the brim no longer holds its curve even after reshaping, signals that the internal structure has failed. Textile fiber breakdown, visible as pilling, thinning, or fraying at the crown seams, means the fabric itself is at the end of its useful life.
None of those conditions are fixed by another wash. They are signals to replace the hat.
The hats worth preserving are the ones built to last. Performance polyester and quality cotton twill hold up to repeated cleaning cycles without significant degradation when you follow the right method. Jaguargolf’s construction choices, including hat quality factors like material selection and seam integrity, are specifically what make the difference between a hat that survives twenty washes and one that falls apart after three.
Clean your hat. But know when the hat has done its job.
Jaguargolf hats are built to handle proper care

Jaguargolf hats use performance fabrics and construction methods that hold up to the hand-washing and gentle machine cycles described in this guide. The materials are selected for durability and colorfastness, which means you get more washes before any visible wear appears. If you are replacing a hat that did not survive cleaning, or simply want headwear that responds well to proper care, the Jaguargolf hat collection is a practical starting point. Look for styles labeled with performance or easy-care fabrics, and always follow the care label on any hat you purchase. Visit Jaguargolf to browse current styles and find the right fit.
Sources
The following sources were used to build and verify the methods, material guidance, and cautions in this guide:
- Golf
- Can You Wash Golf Hats in the Washer? - CaddieHQ
- Do’s and Dont’s: How To Wash Your Golf Hat – Sunday Golf
- Remove salt rings from caps: the safe step-by-step method — FreshHalo
- How to Clean and Maintain Your Golf Hats - The Golf Hub


