

Yes. Stitching quality is the single biggest predictor of how long golf apparel and accessories survive real use, often mattering more than the fabric itself. A polo shirt with premium performance fabric and a 6 stitch-per-inch (SPI) underarm seam will split before a mid-grade shirt sewn with a tight lockstitch at 10 SPI and reinforced bar tacks. That gap shows up fast on the course, in the wash, and in your bag.
Before you buy anything, run this 30-second check:
- Pull test: Tug gently on a seam at the underarm, strap junction, or hem. Quality stitching resists with no gapping.
- Light check: Hold the seam up to a window or bright light. Even, consistent stitches with no skips or loose threads mean tighter quality control.
- Count density: Look for a stitch density that indicates tight and consistent seams on load-bearing areas; noticeably loose stitching is a red flag.
Pro Tip: Check the seam under directional light at an angle, not straight on. Skipped stitches and tension inconsistencies that hide in flat lighting jump out immediately when light rakes across the thread line.
The rest of this guide breaks down exactly how to read these signals, whether you’re inspecting a $40 polo or a $300 leather headcover.
Key Takeaways
Stitching quality, not fabric alone, determines how long golf apparel and accessories survive real use on the course.
| Point | Details |
|---|---|
| Check SPI first | Prioritize checking that load-bearing seams like straps and underarms have sufficiently dense stitching. |
| Run the pull test | Tug gently at seam junctions; any gapping or thread slack signals weak construction. |
| Know your stitch types | Bartacks anchor straps, saddle stitching protects leather, lockstitch resists unraveling better than chain stitch. |
| Don’t trust the sample alone | Bulk shipments can vary from approved samples, so spot-check random pieces before large orders. |
| Choose reinforced construction | Jaguargolf builds headcovers and hats with bartacked stress points and consistent SPI to match these standards. |
Table of Contents
- Why Stitching Quality Matters for Golf Apparel Durability
- Common Stitch Types Used in Golf Gear and What They’re For
- Where Should You Inspect Stitching Before You Buy?
- How Do You Evaluate Stitching Quality Like a Pro?
- What Causes Golf Gear Stitching to Fail?
- How to Care for and Repair Golf Gear Stitching
- How Premium Makers Apply These Stitching Standards
- Editorial Take: Stop Judging Golf Gear by Fabric Alone
- Get Accessories Built to Pass Every Check in This Guide
- Frequently Asked Questions
- Sources
Why Stitching Quality Matters for Golf Apparel Durability
Stitching does three jobs fabric alone can’t do: it transfers load across seams, holds shape under repeated stress, and controls how a garment recovers after stretching. A golf swing puts real tension on shoulder seams, underarm gussets, and waistbands, sometimes dozens of times per round. If the thread or stitch pattern can’t handle that load, the fabric around it doesn’t matter.
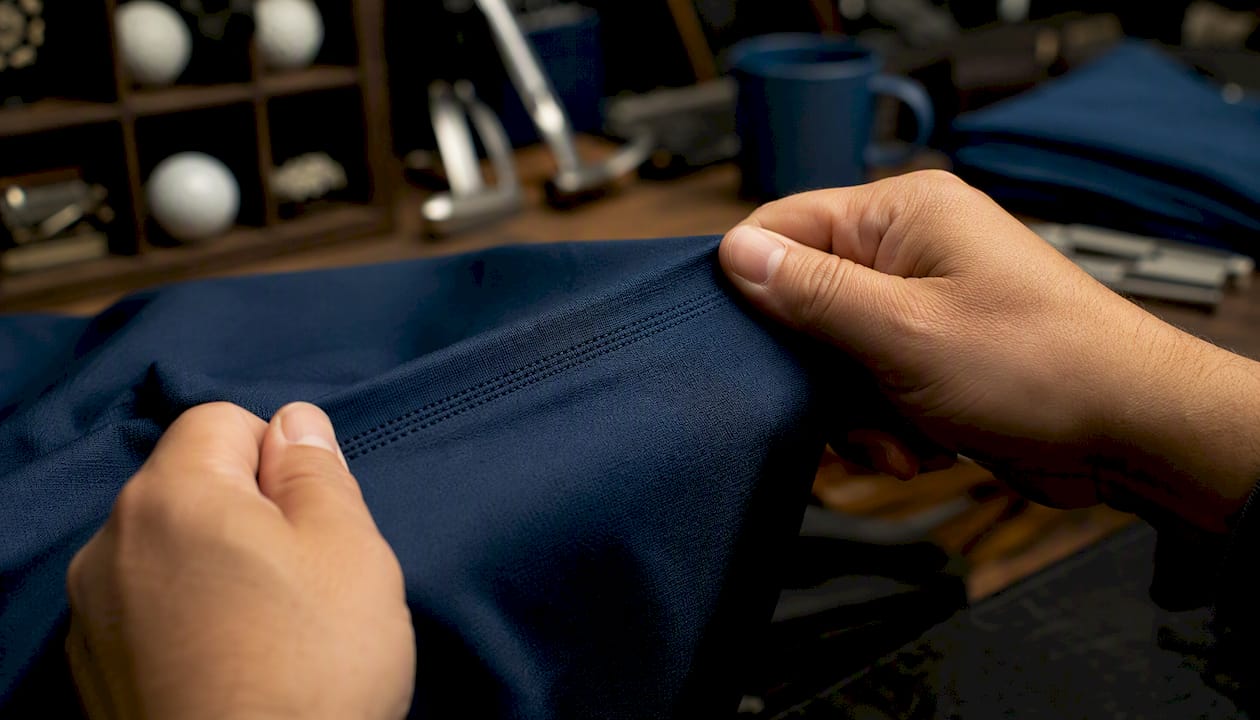
Seam durability and stitching strength aren’t the same thing, and mixing them up leads to bad buying decisions. Seam durability resists long-term wear from UV exposure, moisture, and repeated abrasion, while stitching strength is about immediate load-bearing capacity the moment you swing or grab a strap. A garment needs both, and manufacturers who only optimize for one usually fail at the other.
Here’s how that plays out on specific items:
- Polo shirts: Underarm and shoulder seams take the most rotational stress during a swing. Weak stitching here shows up as small holes or fraying within a season.
- Hats: The sweatband seam and brim join absorb sweat, sun, and constant flexing. Cheap thread degrades here faster than almost anywhere else on a golfer’s gear.
- Headcovers and bags: Strap anchors and pocket seams carry weight every time you sling a bag over your shoulder or yank a headcover off a driver.
Thread quality is a small line item for a manufacturer but does outsized work. Higher-grade thread adds minimal unit cost yet drives a large share of a seam’s real-world performance, which is why it’s worth asking a brand what thread they use rather than only what fabric they use. Polyester and nylon threads resist UV and moisture far better than cotton, making them the standard for anything that sees sun and sweat.
Common Stitch Types Used in Golf Gear and What They’re For
Reading a product label or spec sheet gets a lot easier once you know what the stitch names actually mean. Each type trades off strength, flexibility, and unraveling risk differently, and manufacturers pick them based on where they’ll sit on the garment.
| Stitch Type | Best Used For | Strength | Flexibility | Unraveling Risk |
|---|---|---|---|---|
| Lockstitch | General seams, plackets | High | Low | Low (locks each stitch independently) |
| Chain stitch | Decorative or temporary seams | Moderate | High | High if one thread breaks |
| Overlock/serger | Edge finishing, raw edges | Moderate | High | Low |
| Coverstitch | Hems, cuffs | Moderate to high | High | Low |
| Bartack | Strap anchors, pocket corners | Very high | Low | Very low |
| Saddle stitch | Premium leather headcovers | Very high | Low | Very low (two independent threads) |
A lockstitch locks each stitch in place independently, which is why it dominates structural seams like collars and plackets. Chain stitch looks similar but unravels in a chain reaction if one thread snaps, which is fine for decorative topstitching but risky on a load-bearing seam. Overlock and coverstitch handle finished edges and hems where flexibility matters more than raw strength.
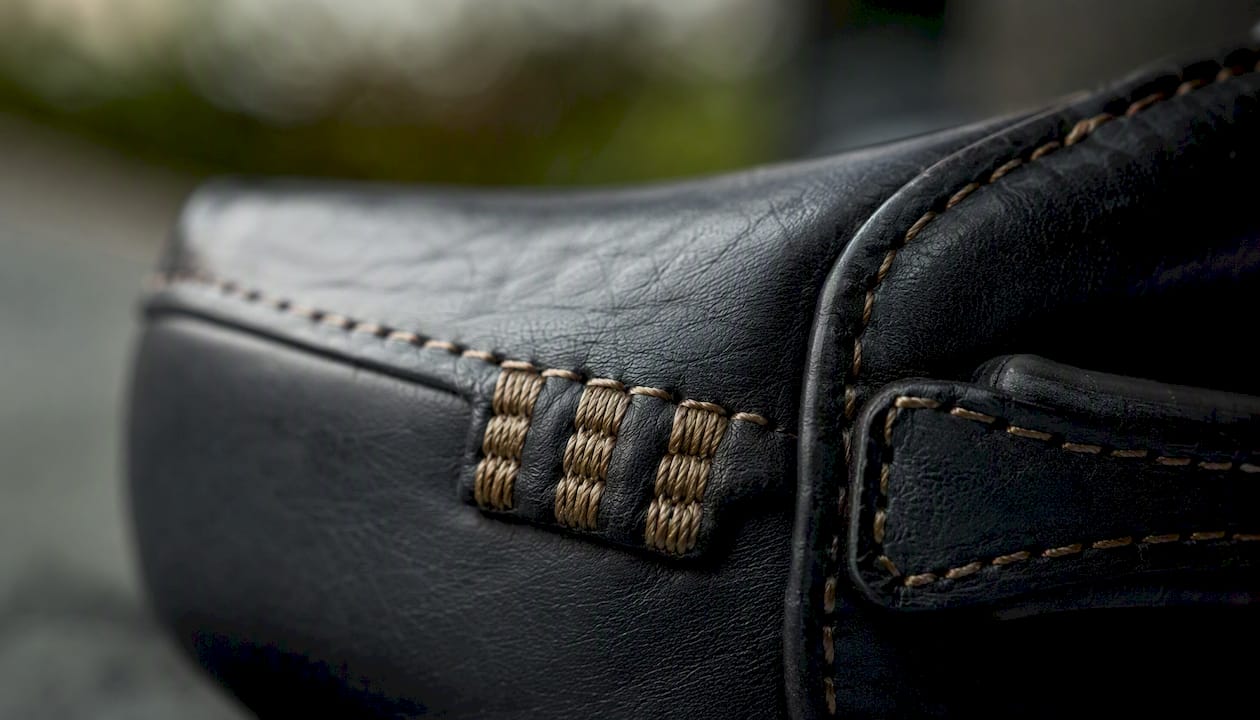
Bartacks are short, dense zigzag clusters used to lock down high-stress points like strap anchors and pocket corners, and you’ll find them on nearly every well-made golf bag. Saddle stitching, done by hand with two needles and waxed thread, is the standard for premium leather headcovers because it uses two independent threads per stitch. If one thread fails, the seam doesn’t unravel the way a single-thread machine stitch does.
Where Should You Inspect Stitching Before You Buy?
Not every seam deserves equal scrutiny. Focus your time on the points that actually predict failure, because that’s where manufacturers cut corners first when costs get tight.
- Polo shirts: Check the placket (where buttons sit), the collar join, and the underarm seam. These areas flex constantly and show wear first.
- Hats: Inspect the sweatband seam and the brim join where the bill meets the crown. Both take sweat and repeated bending.
- Headcovers and bags: Look at strap anchors, pocket corners, and zipper seams. These carry weight and constant friction.
A few field tests take seconds and tell you more than any label:
- Pull gently at seam junctions to check for gapping or thread slack.
- Hold seams under direct light to spot skipped stitches or uneven tension.
- If you can, run a quick wash-and-dry spot check on a sample before ordering in bulk.
One caution for anyone buying beyond a single unit: a manufacturer’s approved sample doesn’t guarantee what shows up in a bulk shipment. Sample approval doesn’t guarantee bulk consistency, so buyers should pull random pieces from a shipment and run the same stress tests on those, not just the sample that got sent for approval.
How Do You Evaluate Stitching Quality Like a Pro?
Once you know where to look, the next step is knowing what “good” actually looks like in numbers, not just impressions. Stitch density, measured in stitches per inch (SPI), is the clearest single metric.
| Component | Typical SPI Range | What Low SPI Signals |
|---|---|---|
| Bag seams, straps | 8 to 10+ | Loose seams that stretch and gap under load |
| Shirt seams (underarm, shoulder) | 8 to 12 | Higher fray risk, faster seam failure |
| Hems and cuffs | 6 to 10 | Fabric puckering, uneven edges |
| Leather saddle stitching | Hand-spaced, consistent | Irregular spacing signals rushed work |
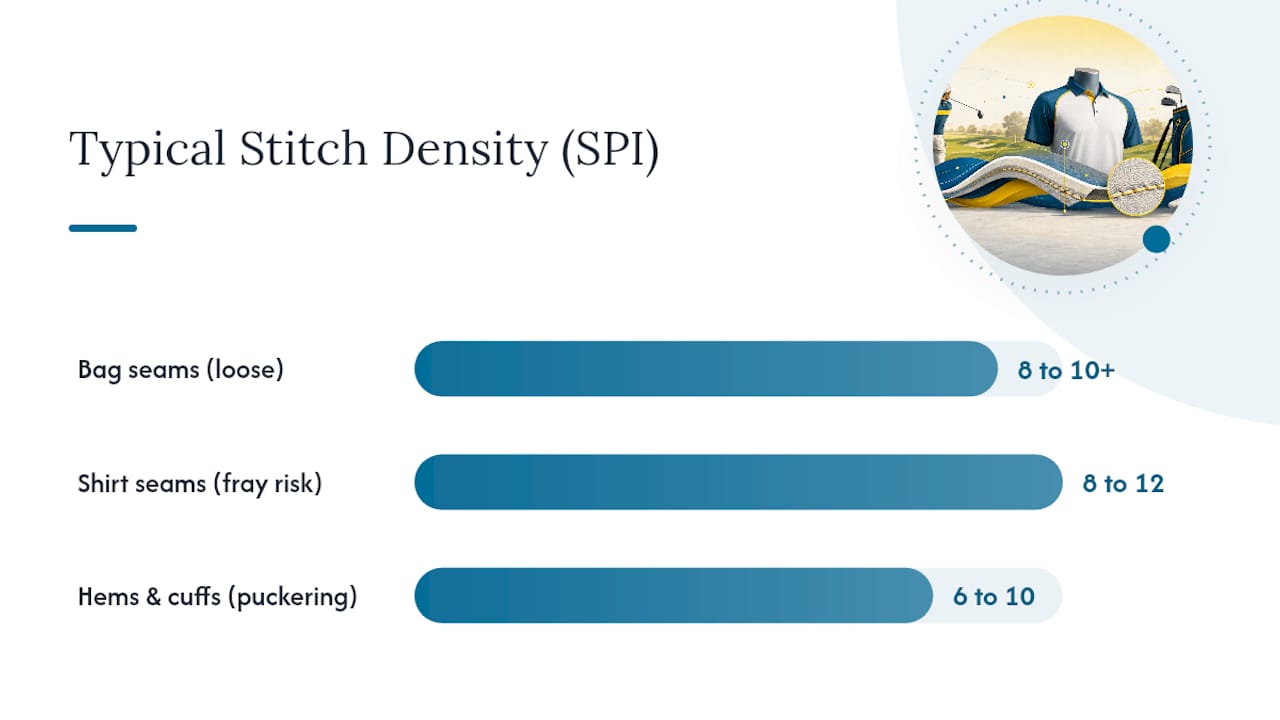
Tighter stitch density paired with consistent tension is one of the clearest build-quality indicators across bags and apparel alike, and most quality bag seams sit at 8 to 10 SPI or higher.
Beyond SPI, run through this checklist:
- Stitch length: Shorter, uniform stitches usually mean tighter quality control than long, uneven ones.
- Seam allowance: Wider allowances (more fabric caught in the seam) resist blowouts better than narrow ones.
- Thread material: Polyester and nylon outperform cotton for UV and moisture resistance.
- Reinforcement: Double or triple stitch rows and bartacks at stress points act as a backup if one row fails.
- Tension consistency: No loops, no puckering, no skipped stitches across the full seam length.
Practical inspection protocols used by manufacturers themselves include stitch skip detection and seam stress pulls at critical points like the underarm, along with button pull tests. A 10-second pull test at the underarm or strap junction, done with moderate force, should show zero gapping. If you see thread slack or hear popping, that seam is already compromised.
What Causes Golf Gear Stitching to Fail?
Most stitching failures trace back to one of five root causes, and recognizing the pattern helps you tell a one-off defect from a systemic quality problem.
- Skipped stitches: Usually caused by incorrect needle size, dull needles, or fabric feeding issues on the sewing machine.
- Seam splits: Often the result of low stitch density or thread that’s too weak for the load the seam carries.
- Puckering: Almost always incorrect tension settings or a mismatched needle size for the fabric weight.
- Thread abrasion and fray: Typically UV exposure, repeated friction (like a strap rubbing against a bag), or low-grade thread material.
- Zipper pull separation: Frequently a bartack failure at the zipper stop, where reinforcement wasn’t dense enough for repeated pulling.
Reinforced double or triple stitching with high-tensile thread at these exact stress points is what separates gear that lasts years from gear that fails in one season. When you see a failure, trace it back. Puckering near a hem usually means a tension problem at the factory, not a fabric defect. A seam that splits cleanly along the stitch line, rather than tearing the fabric, points to thread that was too weak for the job.
How to Care for and Repair Golf Gear Stitching
Small maintenance habits add years to stitched seams, and knowing when to stop DIY-ing and call a professional saves you from turning a small problem into a total loss.
- Re-tension loose stitches early. A hand needle and a few backstitches over a loosening seam, caught early, prevents a full seam split later.
- Use fabric glue or seam tape for travel fixes. These hold through a round or a trip but aren’t a permanent fix.
- Avoid high-heat drying. Heat breaks down thread elasticity faster than almost anything else, especially on polyester-nylon blends.
- Rinse off salt and chemicals. Ocean-course spray and course chemicals degrade thread fibers over time if left to sit.
- Inspect seams seasonally. Catching a loose stitch in March beats discovering a blown seam in August.
For leather headcovers or structural strap failures, skip the DIY fix. Saddle stitching, done manually with waxed thread, is the professional standard for leather repair because it uses two independent threads per stitch. That means one failure point doesn’t unravel the whole seam the way a single-thread machine repair would.
How Premium Makers Apply These Stitching Standards
A well-stitched golf bag or headcover keeps its structure and resale value for years, and that outcome isn’t accidental. Jaguargolf builds its headcovers and hats around the same checklist covered above: bartacked strap anchors, consistent SPI across seams, and reinforced stress points at pocket corners and closures. High-end bags typically feature tighter SPI and heavy-duty thread at exactly the junctions that see the most repeated stress, which is the same standard reflected in Jaguargolf’s construction choices.
Look closely at bartacks on strap junctions and box stitches at pocket corners on any premium accessory. Those small, dense stitch clusters are doing more work than any fabric choice to keep the piece intact after a season of use.
Pro Tip: When comparing headcovers, check the stitch line where the body meets the sock or trim. That transition point takes constant flexing every time you pull a cover on or off, and it’s where cheap construction fails first.
Stitching that looks identical at a glance can perform completely differently under load. The difference between a headcover that lasts one season and one that lasts five often comes down to thread grade and stitch density at exactly three or four junction points, not the fabric printed across the rest of the piece.
Jaguargolf’s approach to precision-fit accessory design treats stitching as a design decision made before fabric selection, not an afterthought bolted on at the factory.
Editorial Take: Stop Judging Golf Gear by Fabric Alone
Most buying advice for golf apparel obsesses over fabric weight, moisture-wicking claims, and thread count, while treating stitching as an afterthought. That’s backward. A garment’s fabric can look and feel premium in a store and still fail earlier than a plainer piece with excellent construction, because the seams, not the material between them, take the repeated mechanical stress of a golf swing.
The conventional advice to “feel the fabric” gets buyers halfway there at best. What actually predicts longevity is boring to check: SPI counts, bartack placement, thread material at the underarm. None of that shows up on a hangtag.
If you take one thing from this guide, prioritize the pull test and the light check over how soft something feels off the rack. Seams fail before fabric does, almost every time. Buy accordingly.
Get Accessories Built to Pass Every Check in This Guide
Jaguargolf designs every headcover and hat around the exact checklist covered here: bartacked stress points, consistent stitch density, and thread chosen for UV and moisture resistance rather than the cheapest option available. That’s the difference between an accessory that survives one wet season and one that holds up through years of rounds. If you’ve read this far, you already know how to check for it yourself.

Browse the Jaguargolf catalog and apply the pull test, the light check, and the SPI count to any headcover or hat before you commit. You’ll see the reinforcement at the strap anchors and pocket seams firsthand, and you can compare it directly against whatever you’re currently carrying in your bag.
Frequently Asked Questions
Does stitching quality really matter more than fabric for golf apparel? Yes, in most cases. Fabric determines feel and moisture management, but stitching determines how long the garment holds together under the repeated stress of a golf swing, washing, and daily wear.
What is a good stitch-per-inch count for golf gear? Most quality seams on bags, straps, and shirt underarms sit at 8 to 10 SPI or higher. Anything noticeably looser is a sign of rushed or low-cost construction.
What’s the difference between lockstitch and chain stitch? A lockstitch secures each individual stitch, so a break in one spot doesn’t spread. Chain stitch can unravel in sequence if a single thread snaps, making it less suited for structural seams.
Why do premium leather headcovers use saddle stitching instead of a sewing machine? Saddle stitching uses two independent threads per stitch, so a single break doesn’t unravel the whole seam the way a machine-made lockstitch can under repeated stress.
Can I fix loose stitching myself, or should I get professional repair? Small loose seams on fabric items can often be reinforced at home with a needle and backstitch. Leather headcovers and structural strap failures should go to a professional for saddle-stitch repair.
Sources
- How to Choose the Best Golf Bag Stitch for Durability and Style
- Seam Durability vs. Stitching Strength: Key Differences - Golf Items, Golf Bag, Golf Accessories Manufacturer|Keep Perfect Golf
- How to Inspect Golf Polo Quality: The Ultimate Buyer’s Guide
- How to Repair Stitching of Vintage Leather Golf Pro Guide


